How to Draw A Bug Easily Step by Step. There are various types of bugs on the planet. Certain individuals are scared by them, and some adore the little animals yet pay little regard to where you fall concerning this current situation; there’s no denying the way that different such bugs can be!
Also, check our Free Tiger Coloring Pages.
Some are great, some are damaging, and some even assist in making food for us! They can likewise be brilliant to rehash in craftsmanship, making it an irrational challenge to figure out a smart method for drawing a bug. This guide will direct you through the technique drawn in with figuring out a workable method for doing precisely that!
We accept that you partake in every little move toward turn guide on the most skilled methodology to attract a bug 6 direct endeavors.
How to Draw A Bug
Step 1
For this fundamental stage of our partner on the fittest procedure to draw a bug, we will begin with the chest of the bug. For the chest, we will use a curved line to make the changed shape in our reference picture.
There will be somewhat opening at the rear lower part of the point at the lower part of the shape. We will fill that opening in one of the subsequent stages, so before long, you’re prepared to advance to the going with stage!
Step 2
Since you have the chest of your bug drawing done, you can begin to attract the waist in this step. The waist is restricted into equal parts, and you will utilize several additional changed lines to make these parts. They will relate in the middle, and you will fill in the initial you left in the chest ahead of time.
It wouldn’t be a genuinely vital bug without a head, in any case, so at this point, we will add that next.
Step 3
As we alluded to early, we will add the head in this piece of our partner on the most skilled procedure to draw a bug. The head will have two slanting ovals at the foundation of it for the eyes. Then, at that point, you can draw several sensors for explicit miserable square shapes with additional ovals near the end. At last, you can involve a couple of sharp lines over the eyes for the most imperative spot of the head.
At last, we will consolidate a leg on each side of the chest. These legs will be drawn, including three districts for everyone.
Step 4
You have two legs for your bug drawing in up until this point, and in this step, we will add two more. These legs will go on the bug’s convergence point, as displayed in the reference picture. They will look comparable to the fundamental ones you drew, yet the point will be a unique piece. You’re prepared for several last subtleties when you make them seem as they do in our model!
Step 5
Soon you will truly have to collect your image, yet first, we have a few clear subtleties to recall this step of our partner for the most skilled strategy to draw a bug. As you know, bugs have six legs endlessly out, and at this point, we will add the last two legs. These will, in addition, be, contained three parcels that broaden in reverse.
Then, when you have those legs, you can add some contorted line building up to the most noteworthy mark of the bug. It’s as simple as that step, and you’re prepared for the last excess! Before continuing toward stage 6, you can correspondingly make your contacts and subtleties.
One thing that you could do is draw a foundation for your drawing. This could propose what sort of climate this bug is in, or you could make a more muddled beginning stage considering everything.
You could comparably add things and props for your bug to talk with, and if you’re feeling powerful you could draw several wrecks neighboring this one! What subtleties and additional parts could you whenever eventually consider that could complete this picture before the last step?
Step 6
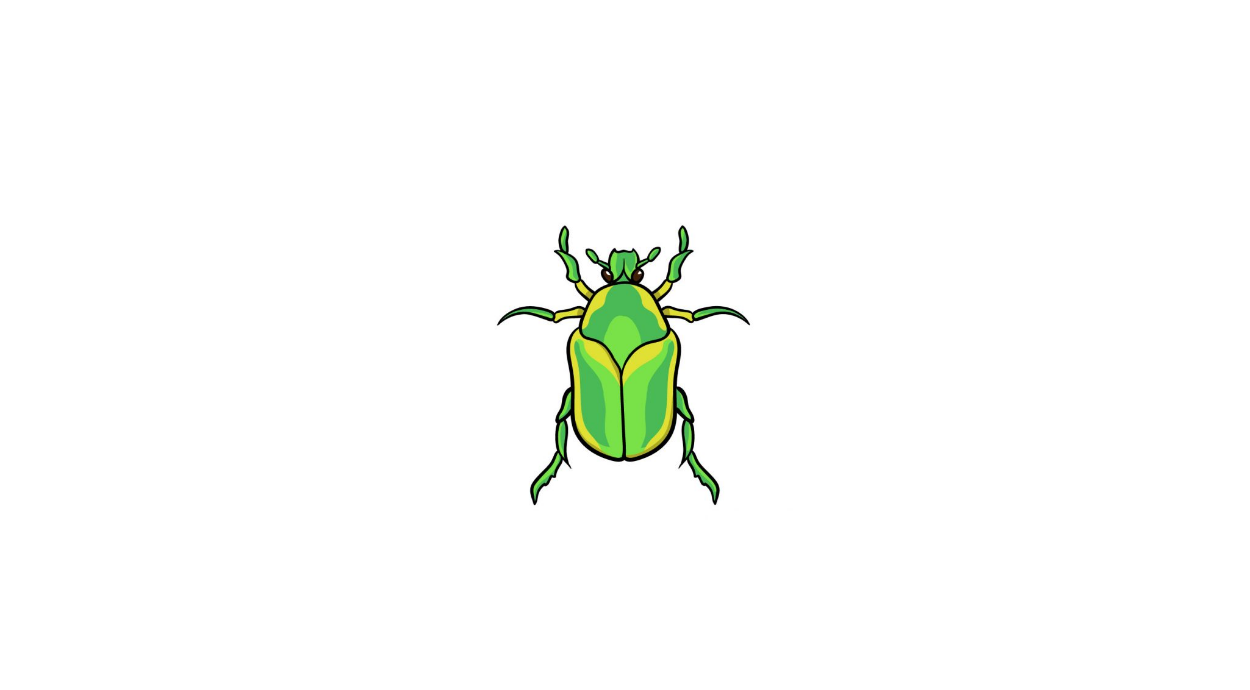
This 6th and last step of your bug drawing is the one that will permit you to pass an astounding tone onto your picture! Our reference picture has shown you only one way you could combine your image, yet this is only one of the different ways you could group this image.
For our picture, we involved many shades of green to collect the bug. However, there are various ways that you could push toward disguising this. Bugs can come in any grouping you can envision, allowing you a ton of opportunity to incorporate your primary tones for this image.
You could make the tones astonishing and incredible or keep them muffled and curbed. It’s start and end dependent upon you, and there are no mistaken strategies!
Exactly when you have picked your varieties, you can besides have a couple of incredible times as you pick which craftsmanship mediums you will use to reestablish them. You could use acrylic paints with disguised pens to keep them stunning and dynamic or watercolors and colored pencils for extra-smothered looks.
Your Bug Drawing is Finished!